Submitting Project
Importing Kickstarter
When you are getting ready to create/start your first project in Hive, you have two options: either import an existing project from Kickstarter, or manually create one from scratch.
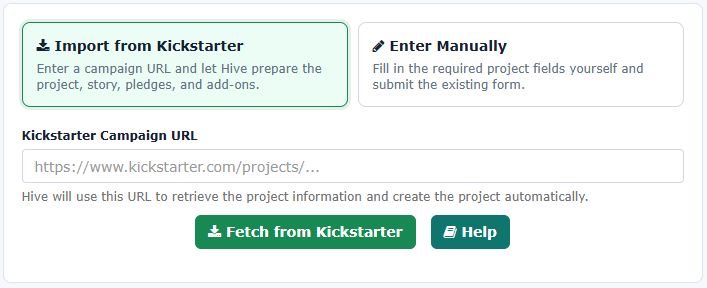
If you choose to import your project from Kickstarter you need to keep the following in mind:
- To import pledges and addons you will need to have launched your project first.
- You need to have you project approved by Kickstarter and have the KS Landing Page ready and live to import the project information.
- When importing pledges/addons, if the process finds a pledge/addon in Hive that already exists, then it will ignore it and will NOT update it. If you want to update an existing pledge/addon in Hive, from Kickstarter, you will need to first delete that pledge/addon.
If you have used different prices for your rewards for Late Pledging, please read this article for more information on how to set this up.
You will still need to properly set up the SKUs in Hive, as this information is not represented accurately in Kickstarter. Read more about working with SKUs in this article.
Manual Submission
If you choose to enter the project's information manually, you will have a little bit more flexibility. When you submit a new project you will need to fill the following information:
- Project Name
- Short Description
- Photo
- Kickstarter URL
- Currency
From the fields above the only one you can not change after your submission is the "Currency". If you need to change the currency of your project you will need to contact us to do it for you.
The rest of the fields should match the relevant fields from your Kickstarter project. You want that so as to make it easier for your backers to identify/find your project and not be confused when they transition from the Kickstarter page to the Pledge Manager page.
Specifically for the "Kickstarter URL", if your project is approved by Kickstarter, then please add your project's landing page. Usually the format is "https://www.kickstarter.com/projects/[COMPANY_NAME]/[PROJECT_NAME]".
If you do not have the above URL yet, then please use the URL that is shared from within the Preview page in Kickstarter. Go to that page, and at the top left corner click the button "Manage Sharing" link as seen in the image below:

A new popup will appear that will look like this:

Click to enable the sharing of your page, and the copy and use that URL as your Kickstarter URL. The final URL will look like this:
https://www.kickstarter.com/projects/[COMPANY_NAME]/[PROJECT_NAME]?ref=[REF_CODE]&token=[ACCESSTOKEN]
Managing Project
Once your project has been submitted, you can access it from the "Projects" page of your account. If you have multiple projects then you will see all of them in that page.
To access the configuration of a project, simply click the button "Manage" you can see under its photo:

Once you are inside the project, you will be presented with a number of tabs that classify and categorize everything that is tied to you project in an intuitive manner. At the beginning you have access to 4 tabs:
- Overview: In this tab you can see information about the current status of your project, as well as with what is required to continue to the next steps.
- Basics: In this tab you will define all the basic information and parameters for your project. Please read the next chapter (below) for more details.
- Story: Here you will be entering the content of your project's page. We recommend that you use the exact same content you have on your Kickstarter page, to avoid and confusion from your backers.
- Rewards: This is where you define all the information about your pledges and addons.
Once your project starts its crowd-funding journey, you will be able to "Advance" the project's status in our platform to the next steps. You can read more about them in this article. Each step will unlock more tabs that will hold the new information .
Project Amounts Explained

The only formula that will always add up is:
Payable = Gross - Payment Fee - Hive Fee
- Gross: The amount your backers paid through Hive's platform.
- Payment Fee: The fee imposed by the payment processor (Paypal or Stripe). For a more in-depth analysis on the fee, read this article.
- Hive Fee: Our platform's fee based on your selected pledge manager package.
- Payable: The amount you are to receive when you request a payout.
- Shipping: The amount you need to put aside to pay your shipping costs as those were calculated by our shipping calculator.
- Tax/VAT: If you are collecting taxes, this is the amount that you need to put aside to pay for the taxes based on the tax rules you have defined.
- Upsell: For each backer if the 'Collected' amount is higher than the 'Shipping' then that is 'Upsell'. If not (e.g. Free Shipping Coupon or paid Shipping in KS) this amount is 0 for the backer.
You may be wondering: Why doesn't the Collected amount equal Shipping plus Taxes plus Upsell?
And the answer is simple: the numbers Shipping and Tax/VAT are not in any way associated with the "Collected" amount. The reason behind this is the fact that backers could have paid part of those costs during Kickstarter.
For example, let's say you have a pledge for $60, and the estimated shipping cost during the campaign (as displayed in the relevant section) was $15. A backer may have paid $75 during the campaign! As such, for that backer the $15 counts as "Shipping" but Hive did not actually collect that amount from them.
Also, some backers may add addons during the campaign, and then decide to remove them, choose something else, or use the extra amount for shipping/taxes.
The numbers for Shipping and Taxes are references for you to know how much money of the TOTAL amount you collected from Kickstarter AND Hive you should set aside for "Shipping" and "Taxes". This will help you not run out of money before the end of the fulfillment.
Settings
In this tab there are several different types of information that you can define for your project.
Unless otherwise specified, most fields will lock once your project advances to "PM Open" state, and you will not be able to update them on your own. If you find a mistake and you want to apply a change after they are locked, please send us an email and we will help you out.
1. Campaign Basics
The information in all the fields below should match the one that you have in your Kickstarter campaign's page. This is needed to make sure that your backers will not be confused when transitioning from one platform to the other.
- Project Name
- Short Description
- Kickstarter URL
- Main Photo
- Youtube URL: You should create a channel in YouTube and upload your campaign's main video. Then fill its URL to this field so that our platform can display it at the top of your project's page.
These fields will lock once your project is approved, and you will not be able to update them on your own. If you find a mistake and you want to apply a change after they are locked, please send us an email and we will help you out.
- Campaign Goal: The goal you have set for your campaign in Kickstarter.
- Campaign Pledged: The final amount that was pledged during your Kickstarter campaign.
- Campaign Backers: The total number of backers that supported your Kickstarter campaign.
2. Visibility
- Featured Project: Highlights this project in your creator's profile page. This is very useful if you already have multiple projects and you want your active project to stand out when people visit your profile.
- Private Project: Keeps this project out of public discovery areas. The project can only be accessed if someone has/knows the URL. This feature is useful if you want to create a project that you want to customize for a specific event (e.g. a convention). You can clone an existing project, tweak the shipping methods and content, and then share the URL via a controled communication channel.
3. Timeline
- Project Launch Date
- Project End Date
- Pledge Manager Deadline: This is the date that you want to announce to your backers that the Pledge Manager will be closing. Please note that our system does NOT automatically moves your project to any next step. As such, this deadline has only two effects. It is displayed in the email invitation and reminder the backers receive to complete their pledge, and after that date our system stops sending email reminders. Read this article for more information on the process of closing your pledge manager.
- Retailer Discount: If you want to give to your retailers a specific discount, fill this field and mark one of your pledges as a retailer's pledge. Then whoever selects it and passes our verification process, will have access to all addons at this discount. Click here to read more about how to handle retailers.
4. Checkout Behavior
We understand that each project is unique, with individual needs. In an effort to not make things extremely complicated, projects by default have with some features disabled. If you need those features you can activate them from the Advanced Settings section of this page.
Those features are:
- Collect Tax/VAT/Tariffs: Check this box if you want the pledge manager to apply Tax/Tariffs to your backers' pledges. You can define tax rules in two different places:
- On the company level in the Taxes Tab of your Account Information's page. These rules are applied to all of your active projects. Treat them as the "default" option.
- Project-specific tax rules. These overwrite any rules from the company level ones you have defined.
You need to BOTH declare Tax Rules (in at least one of the places mentioned above) and check this box for taxes to be applied. For more information about Tax Rules, please read this article. - Enable Survey: Our platform incorporates a very robust, declarative and dynamic survey mechanism which can be used to increase your upsell and your revenue. Checking this box will activate the "Survey" tab in your project. Read more about this feature in this article.
- Prohibit Late Pledges? Check this box if you do not want to allow new backers to support this project. Only existing imported backers will be able to complete a survey and adjust their pledges.
- Allow Address Update for Verified Backers? Check this box if you want to allow Verified backers to update their addresses information. They will not be able to change their Country or the Shipping Method. This flag works in the "PM Closed (Soft)" state, and it is useful if you want to allow backers to update their address after the PM has closed.
- Digital Project: Check this box if your project delivers only digital content. If you do this, the pledge manager will NOT ask for any shipping information from the user. Please note that the backer will still need to fill out their "Billing" information. Even if your project is 100% digital, you need a valid address for accounting reasons.
- Operational State. This field allows you to control the checkout flow of your pledge manager process. In the "Full PM", the backers will have to complete all steps before submitting their pledge. You have the option to open the PM and have the backers only select rewards (pledges/addons) and pay for them, no shipping or taxes are collected. Or you can open the PM and ask the backers to only pay Shipping and Taxes without being able to make changes to their pledge or survey.
5. Tracking & SEO
There are three fields that are tied to your Google / Facebook tracking and/or your SEO (Search Engine Optimization) for your project.
- Facebook Pixel Id: Filing out this field with your Facebook Pixel Id will result in your Pixel being included in all your project's pages. This includes the Pledge Manager and your project's main page.
- Facebook CAPI Token: Filing out this field with your Facebook Access Token will allow our system to send data to your Pixel using the Facebook CAPI integration. This is a very important feature that allows you to optimize your Facebook Ads even when cookies are disabled from backer's browser.
- Google Analytics Id: Filing out this field with your Google Analytics 4 (GA4) Id will result in your tracking script to be present in all your project's pages. This includes the Pledge Manager and your project's main page.
- Tags / Keywords: We use these as the "Keywords" meta HTML tag for your project. You can use this to optimize your project's page visibility in search engines.
- Klaviyo Public Key / Site ID: By filling this key, the system will add the client-side javascript API implementation to your project's page.
- Klaviyo Private API Key: Filling out this field enables the server to server integration of your project with the Klaviyo platform. Our system will send all the following metrics to Klaviyo: Placed Order, Ordered Product, Opened Support Ticket, Order Shipped, Refund Requested, Refunded Order.
6. Advanced Settings
Generally speaking, depending on your project's status, there are 4 buttons that may be visible at any time:
- Pledge Now: Visible only when the project is in "Late Pledging", "PM Open", "PM Closed (Soft)" status. When clicked it takes the backer to the available pledge options.
- Follow: Visible only when the project is in "Pre-Campaign" status. When clicked it asks the visitor for their email, adds it to your "Followers" list and then directs them to your Kickstarter campaign page so that they can follow you there too.
- View On Kickstarter: By default it is visible all the time. When clicked it sends the visitor to your Kickstarter campaign's page.
- Contact Support: Visible all the time. When clicked it directs the visitor to create a support ticket which you can then see through your "Customer Support" page.
There are two attributes that help you customize a little bit your project's page, and specifically the buttons that are available on it.
- By checking the "Hide KS Button?" checkbox, you can force the system to hide the "View On Kickstarter" button form your page.
- By filling out the field "Pledge Now Alternate Caption", you can declare your own text to be replace the "Pledge Now" caption that the system shows by default on your project's page.
We understand that each project is unique, with individual needs. In an effort to not make things extremely complicated, projects by default have with some features disabled. If you need those features you can activate them from the Advanced Settings section of this page.
Those features are:
- Hide Change Pledge Button: By default, during checkout backers are allowed to switch their pledge to something different (maybe they want to upgrade to a higher level pledge). If you do not wish them to be able to do so, activate this flag. Best Practices: You should NOT activate this flag unless you have very strict business reason to do so. You will lose more money from backers that would like to upgrade to higher tiers than from 1 or 2 that would like to downgrade!
- Backer Email Notifications: Check this box if you want the system to send you an email every time a backer completes their pledge.
- Monitor Followers: Check this box if you will run pre-campaign marketing and you wish to use our platform's 'Followers' tab. In the Followers tab you will be able to see a list of all the visitors of your landing page in our platform that clicked the button "Follow", along with information on whether they are existing backers, which other projects of yours have backed, and other statistics.
- Has Loyalty Program: Our platform can help you engage your existing backers and reward them for their loyalty. Check this box if you want to activate the "Loyalty" tab in your project. In it you will find all the functionality you need to implement a Loyalty Program for your backers.
- Survey uses Wizard layout: By default, each question you add in the survey is presented to the backer in a list, one question below the other, one page. Activate this feature if you want to the questions to be present in a "Wizard" layout, one question at a time. Usually if you have only one or two questions per backer, it is best if you present them in one page. If you have multiple questions it is best if you use the "Wizard" layout.
- Hide Add-ons for 'No Reward' backers? Check this box if you want the system to not allow backers that have not selected any reward (e.g. $1 backers) to be able to select add-ons.
- Add-on pricing per pledge? Check this box if you want to be able to set prices for each add-on that are based on the backer's selected pledge. This feature requires you to do extensive testing, and we recommend you talk with our team before activating it.
- Prohibit Pledge Reopen: By default, during the "PM Open" state, backers can reopen their pledges and make changes on their own. Check this box if you want to prohibit them from doing so. You will still be able to manually reopen a backer's pledge, if you wish.
Story
Before submitting your project for approval you will have to enter at least a short "Story".
Our Story Editor, allows you to set up your project's story in a similar way as you will do in Kickstarter. You can actually use Hive's page to test the assets you want to use in your campaign, and you should definitely do.
The Story of you project remains editable until you reach "Pm Closed (Soft)" state. After that you are not allowed to make any more changes.
Best Practices
- Pre-campaign: During pre-campaign you should add a little bit more content and try to describe the basic aspects of your project. That way, when you use your project's page in Hive for your pre-campaign marketing you can test the assets, and see how compelling they are and how successful they are in selling your product.
- Campaign Ongoing and Late Pledging: In this state it is advised that you have the same content as the content you have on Kickstarter. You do not want the people that visit the Kickstarter campaign and then come to Hive to be confused if they see big changes in the presentation of your project.
- PM Open and after: You should try to be as close as you can with the content of your Kickstarter campaign. It is advised to only update photos/images that had placeholder art with the final production quality of your product.
Rewards
Configuring your project's rewards is a chapter or in its own. Our platform supports many configuration settings, which are described in the the article below:
https://www.hiveinteractive.net/wiki/configuring-rewards-pledges-addons-16
Files
You can assign files to your project to make it easier to your backers to find more information about your product.
More specifically you can assign:
- Documents: These are PDF, DOC, DOCX, ZIP files that you can either upload into Hive or have them linked from a 3rd party website (e.g. Dropbox or Google Drive)
- Videos: These are Youtube URLs of reviewers, "How To" videos, unboxing etc that you would like to feature.
To assign files to your project you need to click the button "Files" (either from the project list, or from within your project). The button will take you into the CRM subsytem of Hive, and more specifically to the "Files" module. You can read more about our CRM tools in this article.
In the new screen, click the button "+ Add File" to insert a new record. For your file you should define the following:
- Caption: The title of the file. This will be visible to the backers.
- Type: Set it to either "Document" or "Video"
- Project: This should already be auto-selected to the project you want to attach this file.
- Visibility: Set this to "Public" so that all backers can access it.
- Source: Set this to "Upload" if you are uploading a file, or "External Link" if you are linking to a 3rd party website.
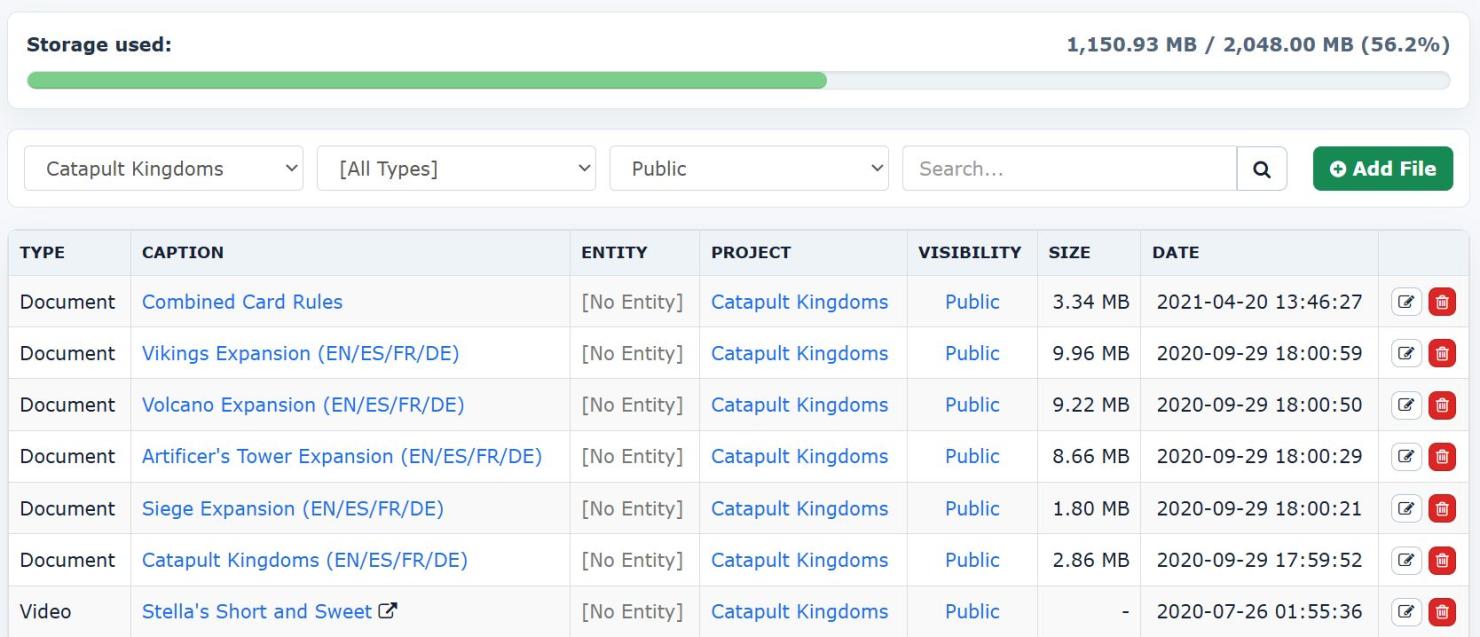
Once the files are uploaded and attached to your project, then when you go to your project's public page, you will see some new tabs that will appear at the top:

- Videos: It will contain the Youtube videos you have uploaded, with an embedded player so that users can start them immediately.
- Downloads: It will contain all the files (local or external) that link to downloadable content.
Testing
Before you Advance your project to the next stage, we strongly recommend that you test it to make sure that your configuration works as expected. To accomplish that you need to go to the "Overview" tab of your project, find the state that you wish to test, and click the button "Preview"

By clicking that button, the system will take you to your project's page and it will force the project to be displayed as if it was in that stage.
You can then select a pledge and go through the process just like your backers will, allowing you to make sure that everything works the way you want, BEFORE you actually invite your backers to complete their pledges.
Please make sure to THOROUGHLY test all you configuration options. Once you advance your project in a stage you can NOT undo that action.
Cleaning Up and testing from scratch
Because you are the admin of your project, you have more privileges and freedom to do things normal backers are not supposed to be able to do. As such, it is good if before you start testing, you find your record in the "Backers" tab of your project and delete it. This will ensure you start with a clean state.
For example if you have already tested the "Late Pledge" state with your account, and then click to test the "PM Open", then you will get an error as if you are a regular backer who tried to access their pledge before the PM is actually opened to the public. To avoid this, first delete your previous record so that you can start testing fresh.
Testing as a Custom Backer
To test the "PM Open" state and the actual full pledge manager checkout process, you should use the button "Test PM Checkout" you can find in the "PM Open" state.

When you click the button, a popup appears that request some information so that it can properly initialize the state of the backer you want to test. Your options are:
- Choose Pledge: You may select any of the available pledges. This allows you to also test pledges that will not be available for regular late pledge backers.
- Choose Addons: This allows you to add addons in the pledge.
- Choose Backer Type: With this field you can set the type of the backer you wish to test. Your options are: Regular KS Backer, Early Bird and Late Pledge.
Be sure to test all of the possible combinations. Especially if you have complicated shipping rules, tax rules and survey questions. Be thorough, and take your time.
Simulating a specific Backer
If you have already imported your backers from Kickstarter and you would like to see the checkout process through the eyes of a specific backer, then find that backer in the "Backers" tab of your project and then select from the available actions ("cog" button) the "Simulate" menu option.
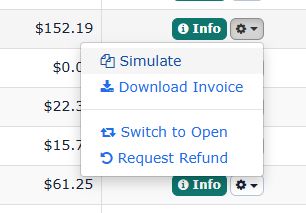
This will start the checkout process by adding the specific backer's option to your test pledge, so that you can see what they will see while checking out.
Test Shipping Methods
Please take your time and choose different types of pledges and select different countries. Try as many combinations as you can to make sure that the shipping costs are calculated correctly and as you expected.
Make sure to also add different types and combinations of add-ons. Whether you have "per weight" or "per item", please make sure you thoroughly test your project before opening the Pledge Manager.
Test Tax Collection
Last but not least make sure that the system also correctly collects taxes based on your needs.
Read more on how to activate taxes in this article.