One Audience, Several Uses
You may want to give early supporters an extra item, offer a credit to a particular pledge group, or understand how backers in one country contribute to your project. Each task starts with the same question: which backers should be included?
Backer Segments let you save that audience as a named set of rules. Define the group once, then select it in Upload Freebies, Upload Coupons, or Statistics without preparing a new CSV each time.
How Membership Works
A segment belongs to one project and is shared with team members who have PledgeManager access to that project. It stores your filter conditions and keyword. Membership is calculated from current backer information whenever the segment is used.
A segment for Open backers will change as people complete their pledges. A segment based on a country or pledge can change when those details change. Saving a segment does not freeze a list of people or automatically award anything to future matches.
Freebie and coupon assignments capture the eligible audience when you start the operation, then recheck eligibility as they process it. Statistics evaluates membership when the report is generated.
Matching Backers and Eligible Backers
The same segment can produce different totals in different tools:
- Upload Freebies: matching Open or Pending Payment backers.
- Upload Coupons: matching Open backers only.
- Statistics: matching backers, with each report section retaining its stated status restrictions.
For example, a segment of early supporters may contain 100 backers, but only 60 may still be Open. Coupon assignment would start with those 60, while a freebie assignment could also include matching Pending Payment backers.
Creating and Managing Segments
Start in your project's Backers tab. Use the funnel button labelled Advanced Filter to open the Backer Filters dialog.
- Click + Add condition, choose a field, choose its comparison, and select or enter the value.
- Add the other conditions that define your audience. Choose ALL conditions (AND) when every condition must match, or ANY condition (OR) when one match is enough.
- Review the summary and the Keyword field. A keyword always narrows the result alongside the other conditions, even when you choose OR.
- Click Save segment and give it a clear, unique name for this project.
- Click Apply filters to review matching backers in the list.
Choosing Useful Conditions
Available conditions include status, early-bird and late-pledge flags, Kickstarter or Hive origin, pledge, add-ons, freebies, country, paid amounts, invitation status, and other backer flags. Survey answer conditions let you select a supported choice question and answer; for per-item questions, an answer on any item can match.
Use + Add group when you need a combination such as early supporters who selected either of two pledges. Set the outer conditions to ALL, add Is Early Bird = Yes, and put the two pledge alternatives in an ANY group. You can also select both pledges in a single Pledge condition using is any of.
Check for an old keyword before saving. A forgotten search term can exclude otherwise matching backers. With no conditions and no keyword, the definition covers all backers in the project.
Example: An Early Bird Audience
Suppose your campaign promised an extra item to early supporters on a particular pledge. Build a segment with ALL conditions, using Is Early Bird = Yes and Pledge is any of the qualifying pledge. Leave Keyword empty unless the promise also depends on a search term.
A descriptive name makes the audience easy to recognize later:
Early Bird - Deluxe Pledge
Review the matching backers before using the segment. You can use this definition for the promised freebie and later select it in Statistics to understand the same audience. Avoid adding Open status if you also want the report to include supporters who have since completed their pledges; the assignment tools already enforce their own eligible statuses.
Loading, Updating, and Removing Segments
Click Load segment, search for the name if needed, and click its green Select button. The saved rules and keyword become the dialog's draft. Apply filters to view the result.
To update a definition, load it, edit the conditions, and save with the same name. To create a separate version, save the loaded definition under a new name. Another existing segment is never silently overwritten just because you enter its name.
In the segment browser, click a name to rename it, then press Enter to save or Escape to cancel. Use the red Delete button and confirm to remove a saved segment. Deleting removes its saved definition, not backers or already assigned freebies and coupons.
If a colleague has changed the segment, reload it before editing again. A segment that refers to an unavailable choice may need to be recreated with current choices; Hive does not silently replace an invalid segment with all backers.
Using Segments in Upload Freebies
Use this workflow when everyone in an audience should receive the same extra items and quantities. The items must already exist as add-ons in the project.
Upload Freebies is available before full project invitations have been sent, while the project is not completed. Only matching Open or Pending Payment backers receive the selected items.
Assigning the Items
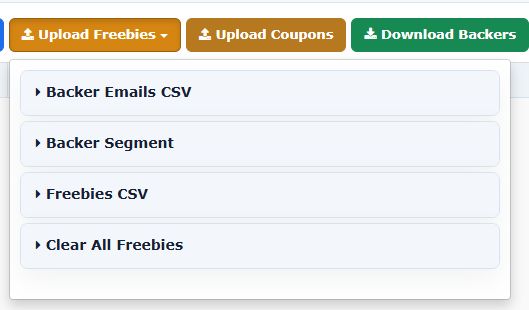
- In the Backers tab, open Upload Freebies and expand Backer Segment.
- Click Choose segment, then Select beside the saved audience. If you need to create one, use Create one in Advanced Filters, save it, then return here and select it.
- Under Freebies to Add, choose an add-on, enter a positive whole-number Qty, and click Add. Repeat for any other items.
- Review the selected segment, items, and quantities, then click Assign freebies.
- Wait for the progress message to show completion and review the assigned and skipped totals.
The selected quantities apply to each eligible backer. Existing freebies remain, and quantities for an item already present are increased. Starting a new assignment with the same items can add them again.
Handling Interruptions and Skipped Backers
If the operation pauses, keep the page open and use Resume. Already assigned freebies remain in place, and resuming the same operation continues without repeating completed quantities. Resume depends on the current page and sign-in session; it is not a permanent job history.
A backer may be skipped if their status is no longer eligible, their freebies were changed during processing, or the combined freebie list would exceed the supported storage limit. Review the result before deciding whether another assignment is needed.
Using Segments in Upload Coupons
Use a segment to give the same credit, free shipping, or both to a defined audience. Hive creates a distinct coupon for each matching Open backer. No CSV is needed for the segment workflow.
The Upload Coupons button is shown before full project invitations have been sent, on projects that are not completed.
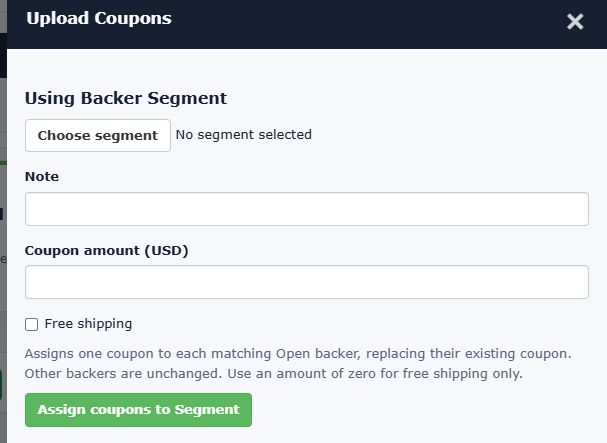
Assigning Credit or Free Shipping
- In the Backers tab, click Upload Coupons.
- Under Using Backer Segment, click Choose segment and Select the saved audience.
- Enter a Note explaining the reason for the coupon.
- Enter the Coupon amount in the displayed project currency, using up to two decimal places. Select Free shipping if required. For free shipping alone, enter an amount of zero and enable Free shipping.
- Click Assign coupons to Segment and review the completed and skipped totals.
For example, a selected pledge group could receive a credit of 5.00 in the project currency with a note explaining the campaign offer. The amount is a credit value, not a percentage discount.
Replacing Existing Coupons
If processing pauses, use Resume on the same page and session. Coupons already assigned remain in place. Backers who cease to be eligible or whose coupon changes during processing can be skipped.
Assignment does not send a coupon email automatically. If you need to explain the offer to your backers, plan that communication separately.
Using Segments in Statistics
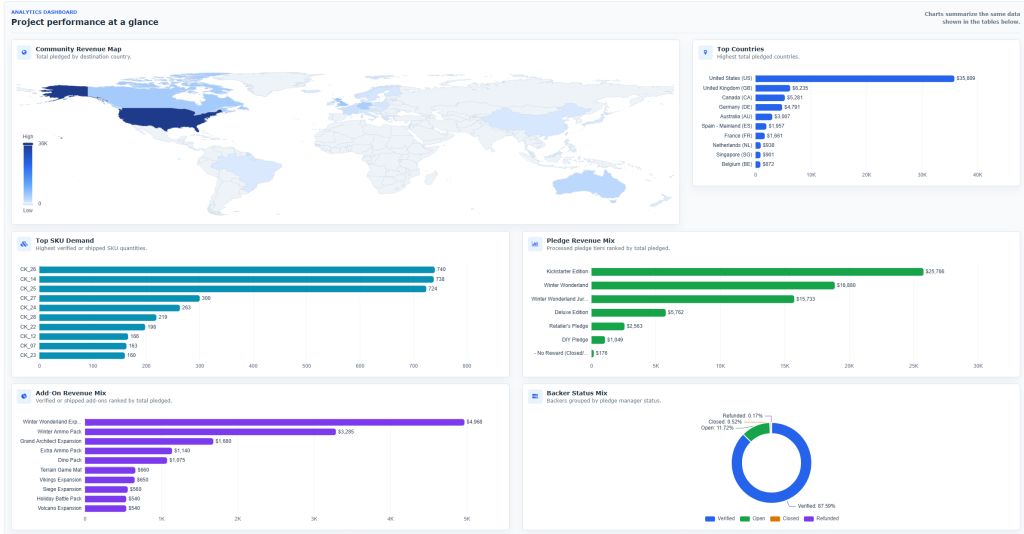
Segments also help you answer focused business questions: how much a pledge group has paid, which items backers in a country need, or how far an audience has progressed through the pledge manager.
- Open the project's Statistics page.
- Click Select Saved Segment, find the audience, and click Select.
- Review the displayed segment name, matching backer count, rule summary, and keyword.
- Read the charts and tables for that audience, or click Download XLS to export the segment report.
- Use All Backers to return to the whole-project report.
Reading the Report Correctly
Segment mode scopes backer-derived financials, pledge progress, pledge and add-on mix, SKU quantities, shipping, geography, digital assignments, and returning-backer information. Each section still applies its normal status restrictions, so its total may be smaller than the overall matching count.
Project-wide packing costs, email progress, and SKU projections are excluded. The financial result is labelled Net before packing. Project status, currency, and end date remain project information.
No matches produces an explicit empty-result notice. An invalid or deleted segment produces an error instead of silently showing all backers.
Saving a Report for Later
The XLS export includes the segment scope, rules, keyword, revision, matching count, generation time, and relevant metric notes. Keep that file when you need a record of what the audience looked like at a particular point.
Membership remains live: opening the report or downloading it again later can produce different totals as backers or the saved definition change. For a useful comparison, check both the rules and generation time rather than relying only on the segment name.
Using Segments in Updates
Some news matters to only part of your project: a delivery change for one country, instructions for a particular pledge, or a message to early supporters. Link an update to a saved segment to reach that group without publishing the message to everyone.
The segment belongs to the same project as the update. Its saved rules and keyword determine the email audience when you publish.
Choosing the Audience and Publishing
- Create and review your saved segment in the project's Backers tab. Check its conditions, keyword, and matching backers before using it.
- Open the project's Updates tab and click Create New Update, or open an existing unpublished update.
- Write the title and description. Under Audience, click Select Segment and choose the saved segment for this project.
- Confirm that the audience reads Only for Backers in Segment: followed by the intended name, then click Save Changes.
- Use Preview to review the saved update. When it is ready, click Publish.
Use Public or Only for Backers when you want the existing broader audience instead of a segment. These choices keep their normal notification rules.
Email Recipients
A segment-linked update queues an email for every backer matching that segment in the project. Kickstarter backers are included when they match. Hive does not add restrictions based on pledge status, a linked user account, or the backer's project-update notification preference.
If you want any of those distinctions to narrow the audience, define the relevant available conditions in the segment itself. A segment with no conditions and no keyword matches all backers in the project.
Notifications use the backer's primary email address, not the alternate email address. The shared email system still applies unsubscribe, blacklist, and email-address validity checks, so matching the segment does not guarantee delivery. Project followers who are not matching backers are not added to this audience.
Example: A Regional Delivery Update
Suppose a delivery schedule changes for Canadian backers. Save a segment with Country = Canada, review its matches, and select it as the audience for your delivery update. Matching Kickstarter and non-Kickstarter backers are included in the email queue.
If the message is intended only for verified Canadian orders, add the Verified status condition to the segment. The segment's rules make that distinction; selecting a segment does not automatically limit the email audience to verified orders.
Managing the Linked Segment
Segment membership remains live. The email audience is selected when the update is published, while website access checks the segment's current rules and the reader's current backer information. Later changes do not automatically send the update again to new matches.
You can rename a linked segment or change its saved rules, but consider the effect on access to existing updates before doing so. A segment referenced by any draft or published update cannot be deleted. If a selected segment is unavailable or invalid, Hive stops saving or publishing instead of sending the message to a broader audience.
Reading the Update on the Website
Segment updates are restricted on the project website, including listings and direct links. A reader must sign in with an account linked to a matching backer. Outside the Late Pledging stage, the backer must also be Verified or Shipped. Authorized project creators and administrators can preview the update.